
A soft smoky eye is a change in depth: darker near the lashes, lighter towards its outer boundary. It can be brown, plum, charcoal or another colour you enjoy. You do not need black shadow, a cut crease or a long wing. This version keeps the shape small so you can see what each layer contributes before committing to more.
Before you start
Choose three shadows from the same broad colour family and compare their depth beside one another. The lightest should provide a gentle transition against your skin rather than automatically being cream or white. Keep one brush free of colour for the final edge. Read each label and use only products intended for the eye area; a matching lip pencil is not an eye substitute.
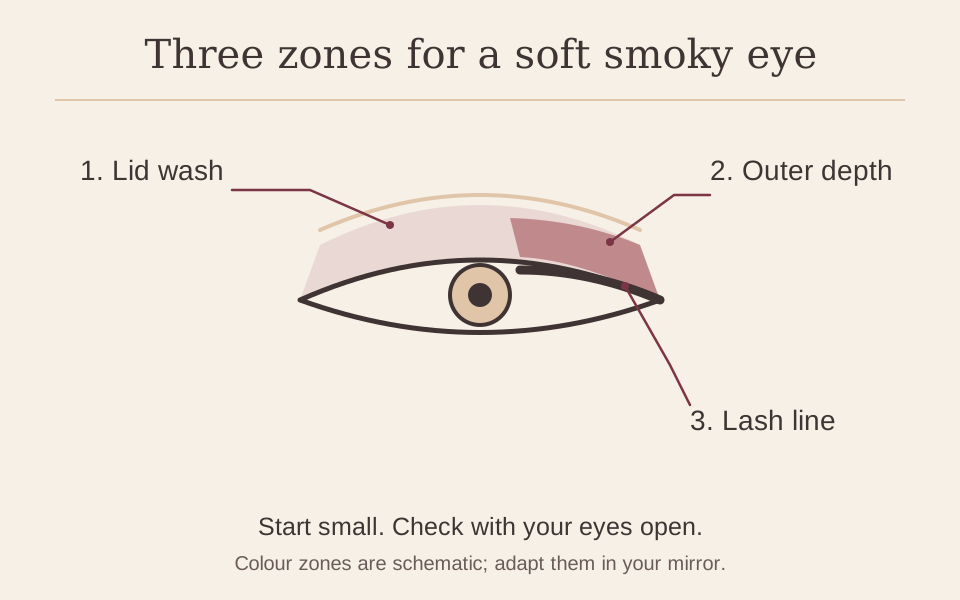
Build the look
- Mark the space while looking ahead. Relax your face and decide where you want the outer edge to end. Begin with a small patch of the middle shade on the outer part of the visible lid. Open your eyes before extending it. A shape that disappears into a fold may need a slightly different boundary, not a much darker colour everywhere.
- Make a light background. Apply the lightest shade over the area where you want the transition to sit. Use a small amount and keep the brow area bare if that is your preference. This establishes a softer surrounding colour without drawing a hard outline that you then have to erase.
- Build the middle zone. Press the middle shade onto the outer lid, then move the remaining colour gently towards the centre. Work in short passes. Pause with both eyes open to compare the visible width, accepting that each lid may need slightly different placement to create the balance you want.
- Keep the deepest shade narrow. With the smaller brush, place the deeper colour just above the outer upper lashes. Blend its upper boundary into the middle shade using small movements. Keep this first version on the upper lid; a lower-lash smoky line is an optional extra for another practice session.
- Blend the boundary, then finish. Use the clean brush around the outside edge with light pressure. Avoid sweeping it through the whole dark area, which spreads the colour. Add familiar mascara as directed, tidy any fallen shadow with a suitable remover, and then complete your usual base and lip.
Choose your approach
Softer first attempt
Use two shades initially: a middle colour and a narrow deeper lash line. Add the lightest transition only if its job is clear.
More evening contrast
Deepen the small lash-line section after checking the finished face. Make the colour richer before making the outline larger.
If the look is not going to plan
| What you notice | What to check | A useful adjustment |
|---|---|---|
| A grey-looking patch | Several colours have mixed on one brush. | Stop adding shadow. If the small patch has become muddy, remove it with a suitable eye makeup remover, then use a clean brush to rebuild with less of the middle shade. |
| A hard outer stripe | The edge carries too much product. | Use a clean brush only at the boundary; remove and restart a small section if blending keeps enlarging it. |
| The two eyes look different | Closed-eye shapes were matched instead of the relaxed view. | Look ahead and compare the visible area rather than copying identical closed-lid outlines. |
Questions you might have
Does smoky have to mean black?
No. A medium brown or plum can supply enough depth. Choose the contrast you want against your own colouring; there is no compulsory shade.
Should I add liner as well?
Only if you want a sharper lash boundary. The deeper shadow already supplies definition. If you add pencil, keep the line short and soften it before adding more.
What if I have hooded lids?
Use your open-eye view to place the visible outer edge. The separate hooded-eye guide explores that decision; do not copy a closed-eye stencil.
Keep practising
For a warmer version, try the soft bronze evening look. If the placement disappears when you look ahead, start with the open-eye placement checks before adding another colour.
Makeup placement and colour are personal choices; adjust the steps to suit you. Follow the directions on your own products.