Brush cleaning is easier when it has a place in your routine and somewhere to dry. Before starting, check the care instructions for your particular brushes. This guide summarises the American Academy of Dermatology’s general method and adds a simple way to organise the task; it is not a treatment for a skin problem.
The basic wash method
The AAD recommends washing makeup brushes every seven to ten days. Its general method is:
- Rinse the tips. Use lukewarm running water. Wet the bristle tips, keeping the metal band and handle out of the water. Do not immerse the whole brush head.
- Wash the bristles. Work the tips through diluted gentle or clarifying shampoo, following the brush maker’s care directions.
- Rinse and repeat. Rinse the tips under running water, repeating the wash until the water is clear.
- Remove excess water. Gently press the bristles with a clean towel and restore their shape.
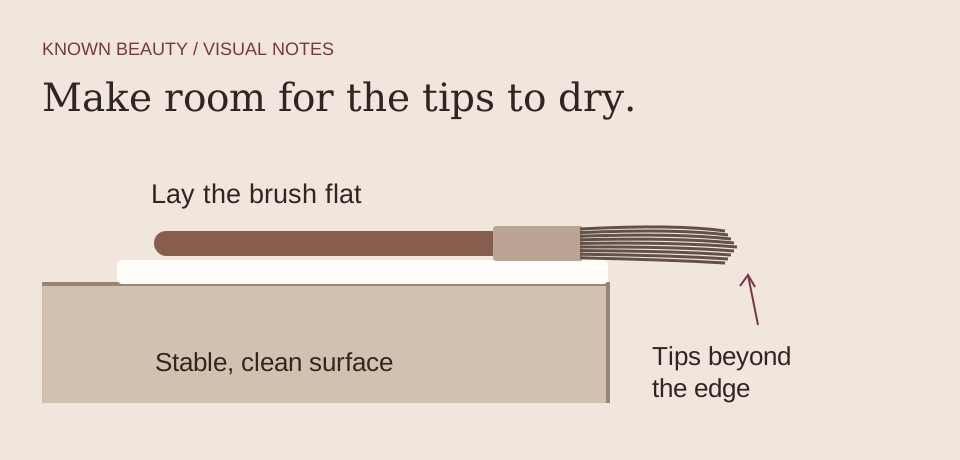
- Lay flat to dry. Let the tips extend beyond the surface edge. Avoid upright drying, which can carry water into the handle.
Set up a drying space first
Choose a clean, stable surface where the brushes can stay undisturbed. Lay out your towel before washing so you are not carrying wet brushes around looking for somewhere to put them. Check that projecting handles or bristles cannot be knocked into a sink or onto the floor. The time a brush needs to dry will vary, so do not plan a precise application time around a universal drying estimate.
Make a small batch manageable
- Separate today’s tools. Identify the brushes you actually used rather than treating the whole storage drawer as one urgent job.
- Check the care guidance. Brush materials, construction and manufacturer’s instructions differ. Follow those instructions where they are more specific.
- Finish the wash before starting another task. Rinse and lay out each brush carefully so an interrupted routine does not leave a half-cleaned brush in a bowl.
- Put away only when dry. Return brushes to a clean storage area, with the shape of the bristles protected from being crushed. Keep your brushes for your own use rather than sharing them.
Make the plan work for you
You need brushes in the morning
Choose a cleaning time that leaves them undisturbed to dry fully; drying time varies.
The item is a sponge or powered tool
Use its own care instructions. A brush method does not automatically apply.
What this guide does not cover
Beauty sponges, powered tools and applicators designed for single use may need different handling. Do not assume a brush-cleaning method is appropriate for every item in the kit. If the tool is damaged or you are unsure how it should be cleaned, check its maker’s instructions before using it again.
When brush-cleaning plans go wrong
| What you see | Try this |
|---|---|
| You need the brush before it is dry | Use a different clean tool suited to the product or choose a routine that can wait. Wash earlier next time; there is no single drying time for every brush. |
| Colour is still rinsing out | Continue the shampoo-and-rinse process described above, while following the brush maker's care directions. Avoid substituting a soak of the whole brush for cleaning the tips. |
| The brush shape or handle looks damaged | Check the maker's advice before using it again. A different cleaning product does not repair loose construction or a damaged tool. |
Questions you might have
Can I clean every item in the bag this way?
No. Use the care instructions for sponges, powered devices and other applicators. This page covers ordinary makeup brushes.
How do I make the schedule easier to remember?
Keep a note of the wash date beside the kit and plan the next clean within the general interval above. Prepare the drying surface before the wash so the last step is ready.
Choose tools and products for the job you need. Check the directions, care information and any compatibility guidance for your own items.